Cues & Columns
Every row in your rundown is a cue — a single timed moment in your show. This guide covers how to add and edit cues, set precise timing, and configure exactly the columns your production needs.
Adding cues
There are three ways to add a cue to your rundown:
- Click + Add Cue to This Block at the bottom of any block
- Press N to insert a new cue below the currently selected row
- Right-click any cue row to insert above or below it
New cues are added to the bottom of the current block. You can drag them to any position using the handle on the left side of the row.
Tab through fields to move forward, Shift+Tab to go back. Press Enter to confirm and move to the next cue.
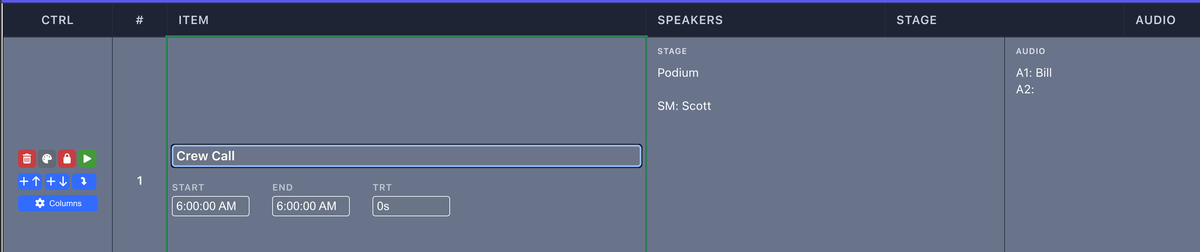
Cue fields
Each cue has a set of built-in fields that you can fill in:
- Item — The cue name. This is the only required field.
- Speakers — Who is on stage or speaking during this cue.
- Stage — Stage configuration, seating, or positioning notes.
- Audio — Mic assignments, sound cues, playback files.
- Video — Screen content, presets, playback filenames.
- Playback & GFX — Replay, graphics, or broadcast cues.
- Lighting — Lighting state or preset name.
- Notes — Freeform notes visible only in the editor.
You choose which of these fields appear as columns — see Managing columns below.
Timing
Every cue tracks three time values:
- START — When this cue begins (wall-clock time)
- END — When this cue ends (wall-clock time)
- TRT — Total Run Time (duration). Enter as
5:00for 5 minutes or1:30:00for 90 minutes.
You only need to enter one of these — ShowCall calculates the others automatically based on the previous cue's end time. The total rundown duration is always shown in the toolbar.
Hard Start times
A Hard Start pins a cue to a specific wall-clock time regardless of what comes before it. Right-click a cue and select Set Hard Start, then enter the time. All subsequent cues offset from that anchor. Hard Starts are shown with a lock icon in the # column.
Over/Under tracking
During a live show, ShowCall tracks whether you're running ahead or behind schedule. The over/under delta appears in the toolbar. You can reset it at any time from Options → Clear Over/Under Times.
Type 530 and ShowCall formats it as 5:30. Type 10000 for 1:00:00. You don't need to type colons.
Cue types & colors
Each cue belongs to a block, and each block has a color that helps you scan the rundown at a glance. Common block types include:
- Walk In — Pre-show audience arrival period
- General Session — Main program content
- Break — Intermission or networking break
- AV/Tech — Technical setup or transition cues
- Custom — Any name and color you define
To create a new block, click + Add Block at the bottom of the rundown. You can rename blocks, change their color, and drag cues between blocks.
Managing columns
Click Columns in the toolbar to open the Toggle Columns panel. From here you can show or hide any built-in field and add custom columns.
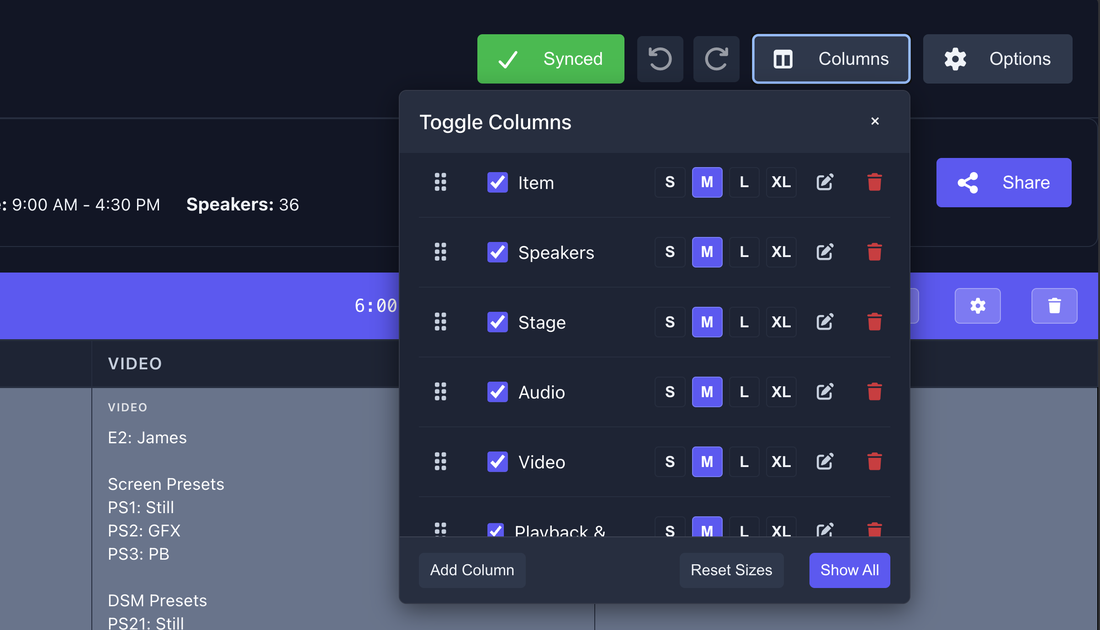
Column sizes
Each column has four width options — S, M, L, XL. Click the size button on a column row to change it. Medium (M) is the default. Use XL for columns with dense content like Video or Notes.
Show All / Reset Sizes
- Show All — Turns on every available column at once
- Reset Sizes — Returns all column widths to Medium
Column visibility and sizing are saved per rundown, not per show. Each day or session can have a completely different column layout.
Custom columns
Click Add Column at the bottom of the Columns panel to create a new column. You can choose from:
- Text — Freeform text entry with optional rich formatting (bold, italic, color)
- Checkbox — A simple tick box, useful for confirmation or sign-off workflows
Give your column a name (e.g., "Confirmed", "Sponsor Tag", "Green Room") and it will appear in every cue row. Custom column data is saved with the rundown.

Reordering & sizing columns
In the Columns panel, grab the ⠿ drag handle on the left of any column row and drag it up or down to reorder the columns. The rundown updates instantly.
You can also rename any built-in column by clicking the pencil icon on its row — useful if your production uses different terminology (e.g., "Presenter" instead of "Speakers").
Drag any cue row by its left-edge handle to move it within a block, or hold and drag it past a block boundary to move it between blocks.